
Notice
Recent Posts
Recent Comments
Link
| 일 | 월 | 화 | 수 | 목 | 금 | 토 |
|---|---|---|---|---|---|---|
| 1 | 2 | 3 | 4 | 5 | 6 | 7 |
| 8 | 9 | 10 | 11 | 12 | 13 | 14 |
| 15 | 16 | 17 | 18 | 19 | 20 | 21 |
| 22 | 23 | 24 | 25 | 26 | 27 | 28 |
| 29 | 30 |
Tags
- javascript 기초
- javascript 함수
- Spring Entity
- Spring CORS
- springbatch
- react
- 코드 중복제거
- react quill custom
- Javascript
- 텍스트가 많은 경우
- SpringBatch 스키마
- javascrpit 기초
- spring security
- spring builder
- JPA Update\
- react Page
- springbatch chunk
- editor Quill
- react jsx if
- react react-router-dom v6
- spring
- react forwardRef
- Spring JPA
- step 테이블
- Docker Windows 설치
- react link
- react Quill
- JPA Insert
- Spring Controller return
- Spring DTO
Archives
- Today
- Total
천천히 알아보는 코딩공부
[react] editor Quill 사용해보기 본문
React-Quill 사용하기
- Quill 이란??

게시판 작성 할때 사용되는 에디터다
1. 설치
yarn add react-quill 또는 npm install react-quill
2. 사용
class EditorComponent extends Component{
  constructor(props){
      super(props);
  }

  modules = {
      toolbar: [
        //[{ 'font': [] }],
        [{ 'header': [1, 2, false] }],
        ['bold', 'italic', 'underline','strike', 'blockquote'],
        [{'list': 'ordered'}, {'list': 'bullet'}, {'indent': '-1'}, {'indent': '+1'}],
        ['link', 'image'],
        [{ 'align': [] }, { 'color': [] }, { 'background': [] }],          // dropdown with defaults from theme
        ['clean']
      ],
    }

    formats = [
      //'font',
      'header',
      'bold', 'italic', 'underline', 'strike', 'blockquote',
      'list', 'bullet', 'indent',
      'link', 'image',
      'align', 'color', 'background',
    ]

  render(){
      const { value, onChange } = this.props;
      return(
        <div id ="main" class="main">
        <div className="pagetitle">
          <h1>운영</h1>
          <nav>
            <ol className="breadcrumb">
              <li className="breadcrumb-item"><Link to="/home"> Home</Link></li>
              <li className="breadcrumb-item active">통합관리자</li>
            </ol>
          </nav>
        </div>

        <div className="section dashboard">
          <div style={{height: "650px"}}>
              <ReactQuill
                  style={{height: "600px"}}
                  theme="snow"
                  modules={this.modules}
                  formats={this.formats}
                  value={value || ''}
                  onChange={(content, delta, source, editor) => onChange(editor.getHTML())} />
          </div>
          </div>
          </div>
      )
  }
}
export default EditorComponent
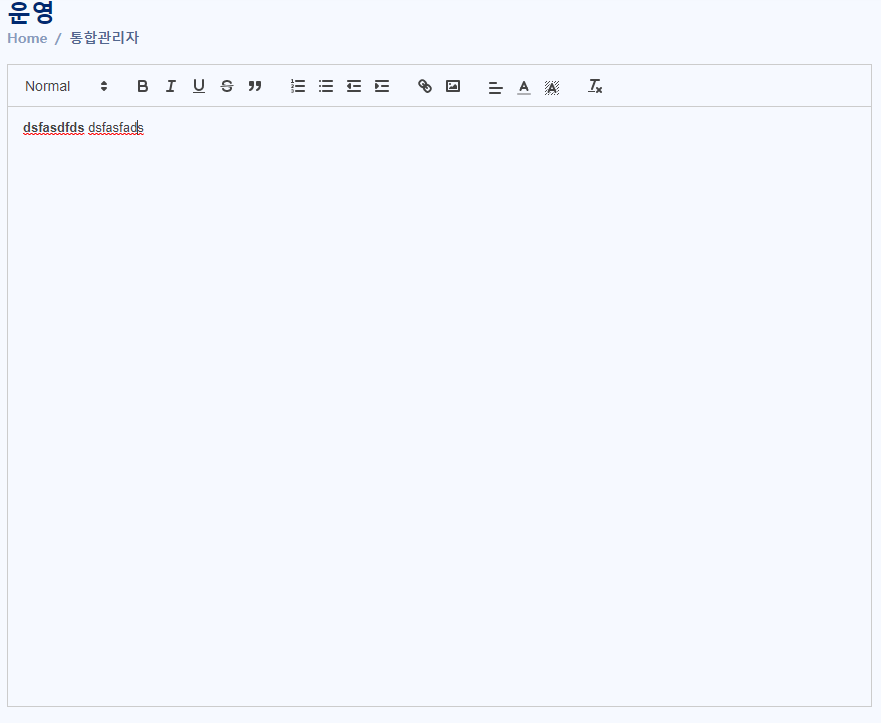
결과 화면 :
3. 커스텀 툴바
- 에디터 툴바 기능을 수정할 수 있다.
import React, { Component } from 'react';
import ReactQuill, { Quill } from "react-quill";
import {Link} from 'react-router-dom'


import 'react-quill/dist/quill.snow.css';


const CustomHeart = () => <span>♥</span>;

function insertHeart() {
  const cursorPosition = this.quill.getSelection().index;
  this.quill.insertText(cursorPosition, "♥");
  this.quill.setSelection(cursorPosition + 1);
}

const CustomToolbar = () => (
  <div id="toolbar">
    <select className="ql-font">
      <option value="arial" selected>
        Arial
      </option>
      <option value="comic-sans">Comic Sans</option>
      <option value="courier-new">Courier New</option>
      <option value="georgia">Georgia</option>
      <option value="helvetica">Helvetica</option>
      <option value="lucida">Lucida</option>
    </select>
    <select className="ql-size">
      <option value="extra-small">Size 1</option>
      <option value="small">Size 2</option>
      <option value="medium" selected>
        Size 3
      </option>
      <option value="large">Size 4</option>
    </select>
    <select className="ql-align" />
    <select className="ql-color" />
    <select className="ql-background" />
    <button className="ql-clean" />
    <button className="ql-insertHeart">
      <CustomHeart />
    </button>
  </div>
);

// Add sizes to whitelist and register them
const Size = Quill.import("formats/size");
Size.whitelist = ["extra-small", "small", "medium", "large"];
Quill.register(Size, true);

// Add fonts to whitelist and register them
const Font = Quill.import("formats/font");
Font.whitelist = [
  "arial",
  "comic-sans",
  "courier-new",
  "georgia",
  "helvetica",
  "lucida"
];
Quill.register(Font, true);

class Editor extends Component{

  state = { editorHtml: "" };

  handleChange = html => {
    this.setState({ editorHtml: html });
  };

  static modules = {
    toolbar: {
      container: "#toolbar",
      handlers: {
        insertHeart: insertHeart
      }
    }
  };

  render(){

      return(
        <div id ="main" class="main">
        <div className="pagetitle">
          <h1>운영</h1>
          <nav>
            <ol className="breadcrumb">
              <li className="breadcrumb-item"><Link to="/home"> Home</Link></li>
              <li className="breadcrumb-item active">통합관리자</li>
            </ol>
          </nav>
        </div>

        <div className="section dashboard">
        <div className="text-editor">
        <CustomToolbar />
        <ReactQuill
          value={this.state.editorHtml}
          onChange={this.handleChange}
          placeholder={this.props.placeholder}
          modules={Editor.modules}
          formats={Editor.formats}
        />
      </div>
          </div>
          </div>
      )
  }
}
export default Editor
- CSS
/* Set content for font-families */
.ql-font-arial,
.ql-font span[data-value="arial"]::before {
  font-family: Arial, sans-serif;
}
.ql-font-comic-sans,
.ql-font span[data-value="comic-sans"]::before {
  font-family: "Comic Sans MS", cursive, sans-serif;
}
.ql-font-courier-new,
.ql-font span[data-value="courier-new"]::before {
  font-family: "Courier New";
}
.ql-font-georgia,
.ql-font span[data-value="georgia"]::before {
  font-family: Georgia, serif;
}
.ql-font-helvetica,
.ql-font span[data-value="helvetica"]::before {
  font-family: Helvetica, sans-serif;
}
.ql-font-lucida,
.ql-font span[data-value="lucida"]::before {
  font-family: "Lucida Sans Unicode", "Lucida Grande", sans-serif;
}

/* Set content for sizes */
.ql-size-extra-small,
.ql-size span[data-value="extra-small"]::before {
  font-size: 13px !important;
}
.ql-size-small,
.ql-size span[data-value="small"]::before {
  font-size: 14px !important;
}
.ql-size-medium,
.ql-size span[data-value="medium"]::before {
  font-size: 18px !important;
}
.ql-size-large,
.ql-size span[data-value="large"]::before {
  font-size: 20px !important;
}
4. 커스텀툴바 결과

'React > 예제' 카테고리의 다른 글
| [react] 게시판 조회 및 Page 처리 - 라이브러리 사용 X (0) | 2022.11.18 |
|---|
Comments